Tips and tricks for Cerner and EPIC
By Catrin Morgan, Bibhas Roy and Rajarshi Bhattacharya
The following guide offers some 'tips and tricks' for use of the common Electronic Patient Record (EPR) systems, Cerner and EPIC, in orthopaedics. The full article 'Electronic patient records – friend or foe?' is published in the September 2025 JTO, page 34-36. Read the article in the issue here.
Tips and tricks for Cerner
Setting up your outpatient clinic (OP)

- Accessing your outpatient clinic is via Ambulatory Organiser through the ‘PowerChart’ button, ensure the correct clinic date is selected.

- Search your / your consultant’s name, depending on how many additional surgeons are in the clinic, additional profiles may be set up – ensure they are all selected to display all the clinic.
-
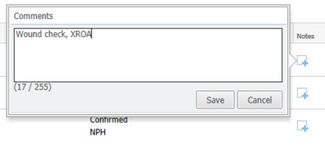 Next to the patient there is the ‘+’ button, you can add a comment which can be used to prepare the clinic in advance.
-
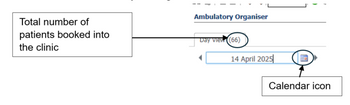 Top tip: You can also view future clinics by clicking on future dates in the calendar icon.
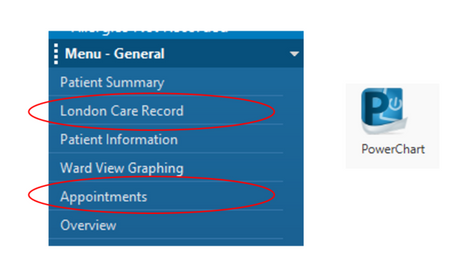
Appointments and GP Records
Click on the appointments tab on PowerChart, this will display all upcoming appointments and previous ones. You can also access the GP Records including the patient’s regular medications, community investigations and some clinic letters via the ‘London Care Record’ tab (or equivalent for outside of London).
Viewing your operating list
- Again you / your consultant’s operating list can be viewed by Ambulatory Organiser (same as viewing an OP clinic).
- Select the date for the operating list and the patients booked for this list are displayed, you can use the ‘+’ button to write any comments about the cases.
-
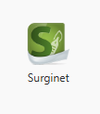 On the day of the list or within 14 days from the date of the list, you can also view it on ‘Surginet’, this is a different button to PowerChart. This is useful if you are covering a pooled list, it also shows you the activity in other theatres.
 -
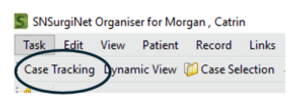 Top tip: On the day of your list, Surginet can displays real-time updates via the ‘case tracking’ button in the tab.
Setting up your favourites
-
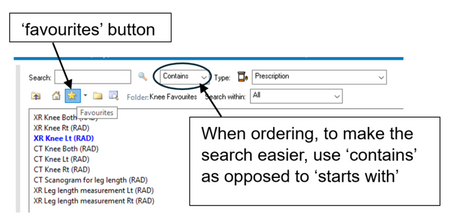 Take time to set up your favourites button, it will save you a lot of time in the future.
 - If there is a specific XR you often request, order it and then complete the mandatory information (yellow boxes). Once the information is filled in, you can add this to your favourites. If you want to order this XR again for any patient, you can access it via your favourites and the mandatory fields are pre-populated.
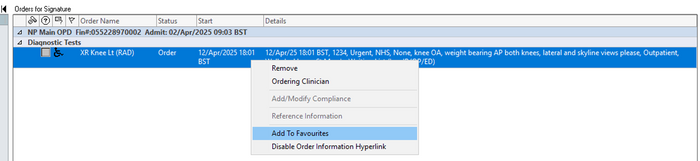
- The same goes for common prescriptions, investigations, swabs/specimens and operations.
- Top tip: Often in trauma theatre, there can be delays due to the operation or XR not being ordered. You can do this by placing an order for ‘emergency ortho trauma’ and ‘mobile image intensifier’.
Shortcuts and operation notes
- The autotext button is a time saver when it comes to the writing of an operation note.
- Once the operation note is written for the first time or you have a previous template, click the ‘auto text button’.
- For a clinic letter you can also set up a shortcut for a paragraph about risks for common operations (e.g. risks).
- Top tip: You can actually ‘borrow’ your colleague’s operation note templates if they have their shortcuts set up, you can do this by clicking the ‘view tab’, and selecting ‘auto-text copy utility’.
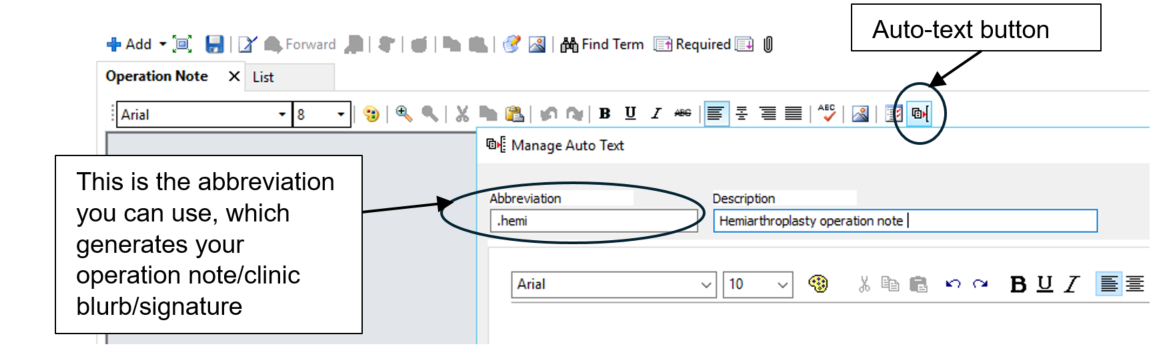
Setting up your signature
- By using the same ‘auto text button’ as above, you can also make a signature shortcut
- This can be especially useful for your clinic letters / ward round entries
- You can type your signature and then create an abbreviation for it (e.g. .sig). When you type .sig, followed by enter this will generate your signature.
- Top tip: If you use a dictation software for your clinic letters and your letters are not screened before been sent out, you can add a comment about this into your signature shortcut ‘e.g. this letter was generated by a voice recognition software, there may be some errors in transcription’.
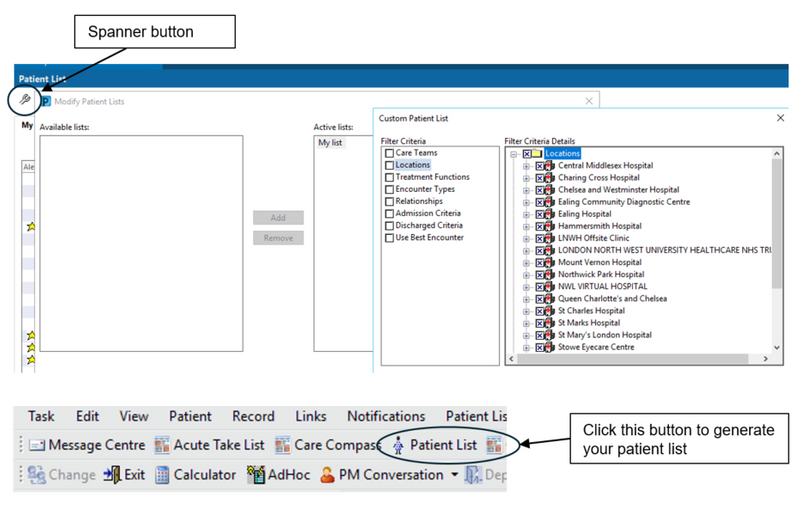
Setting up your patient list
- You can set up a custom list of patients or ward lists (e.g orthopaedic ward)
- This is via the patient list button, click on the spanner icon.
- To generate a ward list, you double click the hospital, select the correct building and ward
- The wards you have selected will then be displayed as a tab when you select the patient list button
- Top tip: If you set up a custom patient list, you can share this list with other members of your team.
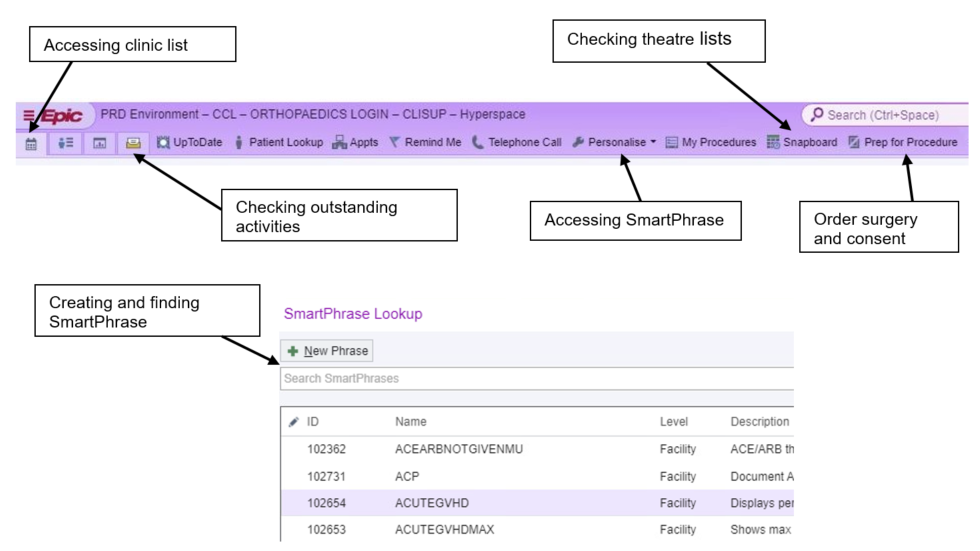
Tips and tricks for EPIC
The above features described in Cerner are all available in EPIC but have slightly different pathways. The EPIC banner has most of the links which are intuitive. It allows quick access to your clinic lists, theatre lists and outstanding activities.
The SmartPhrase option allows to create your own operation notes and clinic notes as well as signature and can be use utilising the ‘.’ followed by the initials used for each template. This can also be shared with colleagues.